How to Resize a JPEG Image Without Losing Quality (5 Easy Steps)
Hello friends! Has this ever happened to you? You take a beautiful photo with your phone or camera, but as soon as you upload it to a website or send it to a friend on WhatsApp, it becomes blurry or pixelated?
Man, this is a very common problem, and believe me, it’s not your fault. Often, we need to resize our images for different tasks. Sometimes for a blog post, sometimes for Instagram, or sometimes just because a large-file-size image won’t go through email. But as soon as we try to make the image smaller or larger, its quality gets “ruined.”
So the question is, Can we resize a JPEG image without losing its quality? The answer is… Yes, to a great extent!
You just need to know the right techniques and the right tools. In this guide, I’m going to tell you those secrets in 5 easy steps, which will let you resize your JPEG images like a Pro, and that too without compromising on quality. So, let’s get started!
Why Does Quality Get Ruined? (The Real Problem)
Before we jump to ‘how to do it,’ let’s stop for a minute and understand why quality gets ruined when you resize an image.
The main reason for this is the JPEG format itself. JPEG is a “Lossy” compression format. This means, whenever you save a JPEG file, it permanently deletes a little bit of the image’s information (data) to keep the file size small.
When you make an image smaller (Downscaling), the software has to remove a lot of pixels. If this isn’t done correctly, your image can look blurry or excessively sharp, causing details to be lost.
And when you try to make an image larger (Upscaling), which is the hardest task, the software has to ‘guess’ which new pixels to fill in the empty space. This guess (interpolation) is almost always wrong, making your image blurry and “pixelated.”
Before You Start: The Golden Rule
Before you open any tool, do this one thing first:
Always make a copy of your original image!
This is the most important rule. Never edit your original, high-quality master file directly. If you make a mistake, you’ll always have the original file safe to go back to. Just right-click on the original image, select ‘Copy,’ and then ‘Paste.’ Now, work on this ‘Copy’ file.
5 Easy Steps: To Resize a JPEG Correctly
Now that you’re ready, let’s look at those 5 magical steps.
Step 1: Choose the Right Tool
This is the most crucial step. Not every ‘Image Resizer’ is created equal.
-
A) Basic Tools (like MS Paint):
Stay away from these! Basic tools like MS Paint use very simple algorithms for resizing. When you make an image smaller in them, it often becomes pixelated and jagged. If you want quality, don’t use them at all.
-
B) Professional Software & Tools (Best Quality):
Your best options are professional software or high-quality online tools.
Software: If you have Adobe Photoshop, that’s the best. If not, GIMP (it’s completely free) is an excellent alternative. These programs use advanced algorithms for resizing.
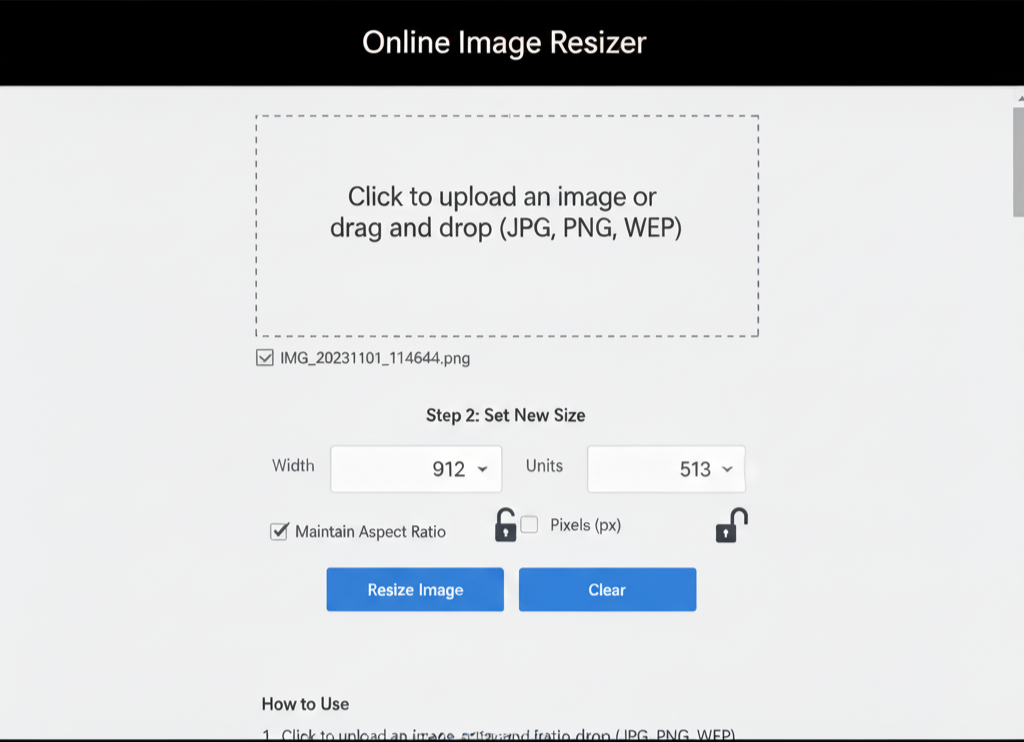
Professional Online Tool: Alternatively, a professional website like Imagereaize.store can also give great results, often using similar advanced algorithms.
These professional tools give you the necessary controls, like the ‘Maintain Aspect Ratio’ option, to ensure quality.
Step 2: Understand Your Goal
Why are you resizing the image?
- Do you need to change the Pixel Dimensions? (e.g., need 1080×1080 pixels for Instagram).
- Or do you just need to reduce the File Size? (e.g., make a 5MB photo into 500KB).
These are two different things. If you only need to reduce the file size, you probably don’t need to ‘resize’ the image, but rather ‘compress’ it. But if you need to change the dimensions (like from 4000×3000 pixels to 1200×900 pixels), then you’re in the right place.
Step 3: The Resizing Process
This is the core technical step.
Using Photoshop or GIMP:
- Open your copied image in the software.
- In Photoshop: Navigate to Image > Image Size.
- In GIMP: Navigate to Image > Scale Image.
- This will open the image scaling dialog box.
Key Settings to Configure:
- Maintain Aspect Ratio (Lock Icon): This is non-negotiable. Ensure the ‘chain’ or ‘lock’ icon binding ‘Width’ and ‘Height’ is enabled. This prevents distortion (stretching or squashing) by automatically scaling the second dimension when you adjust the first.
- Dimensions (Width/Height): Enter your target value in either the ‘Width’ or ‘Height’ field.
- Resample / Interpolation (The Algorithm): This setting dictates the quality of the resize.
- For Downscaling (making smaller): Choose ‘Bicubic Sharper’. This algorithm maintains detail well when reducing pixel count.
- For Upscaling (making larger): Choose ‘Bicubic Smoother’ or ‘Preserve Details 2.0’ (Photoshop). These are designed to minimize blurriness when inventing new pixels. Avoid ‘Nearest Neighbor’ unless you specifically want a pixel-art effect.
Click OK to apply the transformation.
Step 4: Correct Export Procedures
Your resizing work can be undone by an improper save. Never use File > Save, as this will overwrite your file, often with default (and sub-optimal) compression settings.
- Always choose File > Save As… or, preferably, File > Export > Export As… (GIMP/Photoshop).
- Assign a new, descriptive file name (e.g., ‘photo-resized.jpg’).
- Select the JPEG format.
- The ‘JPEG Options’ dialog will appear. This is where you control the final quality-to-size ratio.
- The Quality Slider: A 100 setting is unnecessary. It produces a massive file with no discernible visual benefit over 80-90. For web use, a quality setting between 70 and 85 provides the best balance of detail and file size. Avoid going below 60, as this is where “compression artifacts” (visible blotches and pixelation) typically appear.
- Format Options: If available, select ‘Progressive’. This allows the image to load gradually on websites, improving the user’s perceived load time.
Click ‘Save’ or ‘Export’ to finalize the file.
Step 5: Review and Validate
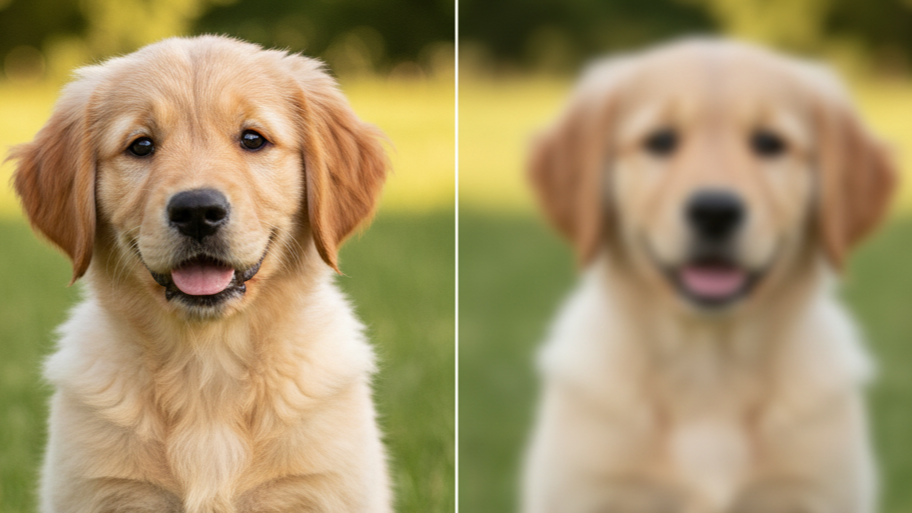
The final step is to validate the output. Open your newly resized image and view it side-by-side with the original.
Zoom to 100% on both images to conduct an accurate comparison. Examine the resized image for any unacceptable blurriness, loss of critical detail, or compression artifacts. If the quality is clear and the dimensions are correct, the process is complete.
If the result is too blurry, repeat Step 4 and export at a higher quality setting (e.g., 90 instead of 80).
Bonus: AI-Based Upscaling
While traditional upscaling (enlarging) is limited, modern AI tools offer a new solution. ‘AI Image Upscalers’ use machine learning models to analyze the image and intelligently generate new pixel data, rather than just interpolating it.
Services like ‘Gigapixel AI’ and various online AI upscalers can often enlarge an image by 2x or 4x with surprisingly coherent results. While not perfect, this technology is invaluable for restoring old, low-resolution photos.
Conclusion
Resizing a JPEG without quality loss is a matter of process and precision. By adhering to these five steps, you ensure your images remain sharp, clear, and professional, regardless of the target dimensions.
- Always work on a copy of the original file.
- Use professional software (Photoshop, GIMP) or a high-quality online tool.
- Always Lock the Aspect Ratio to prevent distortion.
- Select the correct Interpolation Algorithm (‘Bicubic Sharper’) for the task.
- Export the file using ‘Save As’ and set JPEG quality to 70-85 for an optimal balance.
Following this methodology will allow you to consistently produce high-quality resized images for any platform.